Monday, December 9, 2013

Crunchy Tuna Wraps

Merry Christmas everyone! :)

This Christmas is a first of many for me - it is our first Christmas as a married couple, first Christmas with our dog, first Christmas in our house, and MY first Christmas with a real live tree! Hubby insisted, and I agreed to try. Here it is:


Pretty proud of ourselves! I like it a whole lot :)! Going to pick out the tree was a lot of fun too and made for an adorable midweek date. Putting it up together required lots of patience on my end, but decorating it and dancing to our Christmas pandora station was so romantic. Maybe it's because our anniversary is so close (!!!!!).

Did you  know that December and the holidays are a busy time of year for musicians? Things can get very hectic when you and your hubby are involved in multiple concerts, including two separate Messiahs! I think this year I have about 8 concerts total, including choir, school, and handbell choir performances, phew! Dinner plans and routines can get a little wonky.

So, I often resort to fast easy dinners. This meal is yummy, quick, and.... CHEAP. Canned tuna in all its glory. Hubby loves this one, and I do too!

Ingredients:
2 large cans of tuna (I prefer in water), drained
1 cup of Greek yogurt
1 cup of shredded cheddar cheese
1 half cup of your favorite salsa
1/4 cup of green onion, chopped
I clove garlic, minced
Handful of cilantro, chopped
Juice of 1 lime
Pinch of cumin
Salt and pepper to taste
Tortillas
Olive oil 
Chili powder

How to make them:

Pre heat the oven at 425.

Really simple. Open the tuna cans and drain them. Mix all of the ingredients together. 


If you want them creamier or cheesier, add more yogurt and cheese. :)

Then, assemble the tortillas. Put about two heaping spoonfuls into the center of each tortilla and roll them up tight. I kinda fold them into squares. It should make about 6 or 7 tortillas depending on the size. Brush each wrap with olive oil, and sprinkle with chili powder. 

Bake on a cookie sheet until they are golden brown and crispy. 


Ooey gooey and a crunchy tortilla, and it really elevates the whole canned tuna thing. You could sub in shredded chicken if you can't stand canned tuna. We dip them in guacamole, but you could dip in salsa too!

Enjoy :) 

Sunday, October 13, 2013

Sara's "THE BEST" Guacamole

Bad blogger! We've had a lot going on.... you know, moving again, buying a house :) All happy awesome things, but busy things! We're feeling a lot more settled now though. Being a homeowner is just as hilarious as everyone warned us it would be. A few gas leaks, no hot water, and delayed internet later... it's feeling a lot like home. Mr. Darcy sure is happy.... he has a huge fenced in backyard! But this is still his typical position....


He's super cute. Anyway.

Have I mentioned I love my new kitchen? I've been cooking up a storm per usual. Speaking of which, I figured I'd share one of my best recipes to make up for the lack of posts lately. 

I am not usually one to brag.... okay that's a lie. 

But I only brag when it's the truth!! ;) 

I make the best guacamole ever. EVER. This is a not a lie. Several people can attest to this. I bet I could sign a petition and get many many signatures. I have tried other guacamole. I have tried it at Mexican restaurants. Mine's the best. Sorry not sorry.


Eh, guacamole doesn't photograph too well.... but trust me, one bite on some yummy tortilla chips and you will sign the petition too.


The Ingredients
3 RIPE avocados**
1-2 cloves garlic, minced
1 tablespoon greek yogurt
1 dash of sriracha 
1 handful fresh cilantro, chopped
Juice from 1 fresh lime
1 tsp chili powder
1 tsp crushed red pepper flakes
Salt and pepper to taste 


How to make it:

**Okay, let me start off by saying the key to the best guacamole starts with your base, the avocados. They need to be ripe. When I shop in the grocery store, I look for avocados that have a dark skin and are pretty mushy when I squeeze them. 

First, you need to get the yummy avocado-ness into your bowl. I cut them like this:


Ta da! Then I simply squeeze them into the bowl. Note: KEEP THE PIT. This keeps your guacamole from oxidizing and turning a yucky brown color. The pits should be in the guacamole. Trust me, this is for the best guacamole ever.


See? They should be so ripe that they just come out no problem into your bowl.... I smartly chose a guacamole colored bowl for this photo shoot.... eh.... all well. ......... start mashing your avocados with a fork or spoon to make it smooth. This is why I add the greek yogurt, it helps make it smoother and creamier, and also a nice tangy taste. 


Give the cilantro a rough chop, and add the rest of your ingredients to taste. I have found the key to success is to make the spices how you like, and not to be skimpy with the salt. 


Mmmm cilantro. Oh you don't like cilantro? Well you're weird. Just kidding (....) but seriously, my future sister in law doesn't care for it either, but she loved it in my guacamole :) 

And then you're done!!!! And ready to serve on yummy tortilla chips or with some tacos or nachos or wraps or whatever! :) :) If you need more, just add more avocados and adjust the rest of the ingredients. If you like more lime, you can add more of those too.... my brother in law requests a lot.


What's the best thing you know how to make? :) Ttfn!


Sunday, August 25, 2013

Grilled Bacon-Wrapped Jalapeno Poppers

It's back to school time for students.... and teachers! I am loving my new job - the kids are great and everyone has been super welcoming. Elementary music so so fun.  Hopefully we will be moving soon and then I will only have a five minute commute again! I've also joined a handbell group and plan on doing Choral Union, so I am going to be a busy bee.

Just because school is back doesn't mean hubby and I have stopped grilling ;) In fact I want to get in as much grilling as possible...clinging to what is left of summer. Nice thing about living in the south, the warmish weather and football season overlap a little bit...cant' wait for football season! Go Eagles :P And what we've been grilling lately can work for summer or fall.... or anytime really, but I'm obsessed with jalapeno peppers.

This fun appetizer is one I was introduced to last summer at a fourth of July party, right after my husband and I got engaged. My new aunt and cousins absolutely love these and I was pretty much their biggest fan...I can't get enough of them. For our wedding gift they got me a pepper de-seeder and some other fun grilling equipment - they know me so well!! ;)


Oh yeah. That's bacon. And cheese. And we grilled um. Yuuuuuuup.

Ingredients:
12 or so medium to large jalapeno peppers, seeded
6 thick pieces of bacon
1 block cream cheese
1 tbsp greek yogurt
1 clove garlic, minced
1 tbsp red pepper jelly
2 tbsp mint, chopped
1 tbsp cilantro, chopped
1/2 lime juice
Salt and pepper to taste

How to make them:

First, you whip up the filling. Cream cheese, garlic, red peper jelly, mint, cilantro, salt and pepper, little greek yogurt, lime juice...yummmmm... you can tweak this however you want, just remember that it should be sweet and cheesy, there will be spice a plenty.


 You can find hot pepper jelly at most decent grocery stores and probably at a farmer's market. I found this one at Fresh Market. :) Sweet and a hint of spice.


Next, you get to seed the jalapeno peppers. Cut off the tops and scoop out everything until they are quite hollow. Then, stuff those suckers with the filling! I'm really sloppy, I just use a spoon and keep pushing it down and scraping off until I feel there's plenty in there. 


 Next, wrap them in bacon and secure with toothpicks. Then you can go ahead and grill them or cover them and stick them in the fridge until hubby (or you!) is ready to grill.


Then you can put them in a pepper stand, or like we did, stuck them right on the grill. Grill them until the jalapenos have some nice char marks on them and the bacon is cooked to your liking. Hubby is a grilling expert, nice cute picture of him below here.


Caution, they will be piping hot..... it's very hard to wait for them to cool down so you can eat them!


So good! Anyone else have other grilled appetizers they love?

Sunday, July 14, 2013

Cherry Tomato Bruschetta

I've been a bad blogger lately! But I have legitimate excuses, I promise.

I prefer to blog from my laptop, and I had one from work. However, I needed to give it back becauuuuse....

I got a new job! :-) :-) I will be teaching elementary music literally five minutes from my husband's job, so no more one hour + commutes for each of us! This also means we are moving and looking for a place to live in Lynchburg - cue stress cue crazy excitement!

So anyways, my husband brought his laptop home, and I wanted to share my new recipe obsession with you all....


Bruschetta!

My husband has a very green thumb. His garden this summer has been very successful, and I find myself and abundance of cherry tomatoes and basil. So needless to say I've been making bruschetta a lot - as a yummy snack for myself with toasted bread or even as a main course with pasta.


Crazy overgrown cherry tomato plant, courtesy of the hubs.....

1

And what I do with it!! I usually eat this as a snack when he's at work so he is a little miffed he hardly gets to eat his tomatoes... anyway :-P

Cherry Tomato Brurschetta
1 cup or so cherry tomatoes, cut in half
Generous handful of fresh basil leaves
1 clove of garlic, minced
1 tsp salt (or to taste)
1 tsp fresh cracked black pepper (or to taste)
Juice from 1/2 a lime
1 tbsp olive oil
Splash of balsamic vinegar
Dash of crushed red pepper flakes

How to make it:


Carefully cut all of your cherry tomatoes in half and put in a bowl. Add the rest of the ingredients and mix around gently so the tomatoes can absorb all the flavors. Stick in the fridge and allow the bruschetta to marinate for at least 15 minutes.


Serve with on top of toasted bread with cheese or even toss with pasta!

The fresh cracked black pepper is really awesome.... totally worth it if you are still using regular black pepper.


I will keep everyone posted on our new adventures! We're very excited for this move and our new life in Lynchburg. :)


Sunday, June 2, 2013

Grilled BBQ Chicken with Cilantro

My husband Clyde often describes himself as a goat. The animal. 


It is mostly true in that, 95% of the time, I am very blessed because this man will eat anything. He isn't picky. Any cuisine, any ingredient, any meat, soup, salad, stew, pasta, etc etc etc.

He eats it, smiles, gives an encouraging comment so I'm satisfied, and will even eat leftovers.

But then there are very rare days, I'd say once a month or so, that he wants something VERY specific - chocolate pie, for example.

Yesterday, he observed that we should grill out. It was a beautiful day and we had just gotten back from taking Mr. Darcy to Woofstock in downtown Roanoke where he got to meet LOTS of new friends!!

Darcy is so cute. Anyway, back to my story.

I responded that it'd be a great idea! He suggested bbq chicken. I got all excited and started looking up super fancy recipes on pinterest and various blogs --- he started getting quiet and making non committal sounds, like "eehhh" or "hmm....". Finally I rolled my eyes and said BBQ chicken it is. He grinned like a five year old boy and even went to the grocery store with me. That doesn't happen very often anymore, haha!

He also mumbled something about orzo... sigh. He's been on an orzo kick lately. I made that too.

But I still wanted to add my own twist, so hah! I did. Here is our version of BBQ grilled chicken. I kind of made up the sauce and the brine, but here it is to my best recollection.....


BBQ Grilled Chicken

Makes about 6 chicken legs and 4 chicken thighs.

The Brine:
1/2 cup white wine vinegar
1 cup of water
2 cloves garlic, crushed
1 tbs kosher salt
1 tbs pepper

The Sauce:
1 tbs olive oil 
1 onion, chopped
2 cloves garlic, crushed
1 cup ketchup
1 tbs molasses
1/3 cup fish sauce
Dash of worcestershire sauce
1 tbs soy sauce
1 tbs sriracha sauce (or some kind of hot sauce)
1 tbs chili powder
1 tbs paprika
1 tbs cumin
1 tbs tumeric
Salt and pepper to taste
Handful of cilantro, chopped
Fresh chopped cilantro for garnish


We bought two packages of bone in skin on chicken - had about six chicken legs and 4 chicken thighs. You can use whatever you want of course. First, I marinated the chicken in a brine. Whisk the brine together. Put the chicken into a gallon zip loc bag and dump the brine over it, close the bag, shake gently, put in the fridge for at least half an hour. I left it in there for about two hours.

You can also prep your sides - we did the veggies with fire and ice sauce again. Yum!

When your grill master is starting to  move towards prepping your grill, start making the sauce. Put a sauce pan over medium heat and add the olive oil. Add the chopped onion, mix it around. Then add the garlic. Once it becomes fragrant and starts smelling yummy, add the rest of your ingredients. Make sure you keep tasting and adjusting, that is key! If you want more spice, add more sriracha or crushed red pepper flakes or hot sauce or something. Clyde and I like spice.

In order to cook these, you need to be able to control the heat on the grill a little bit. If it's gas, make sure it's medium low heat. If you have charcoal, put the coals on one side so one side is super hot and the other side is cooler --- you want a medium to medium low heat so they can cook longer without burning.

Sear the chicken (don't put the sauce on yet) on both sides for a few minutes and then move to the cool side of the grill. These need to cook about 25-30 minutes. Near the end of the cooking, start coating them with sauce using a grill brush thing. They should start to look extremely yummy. Keep lathering them with sauce so it starts to brown and caramelize and be amazing.


This is what ours looked like when they were done. If you are nervous about cooking the chicken all the way through,  I'd suggest testing one and then popping them in the oven for five to ten minutes just to be safe. I topped with fresh cilantro! Ta da! The chicken was sweet, spicy, tangy, crispy, smoky, and yuuummmmyyyyyy.

We ate these with our grilled veggies, and I made an adult mac and cheese with orzo. We also enjoyed some gin and tonics too :)


Enjoy!

Monday, May 27, 2013

Grilled Chicken Satay and Veggies with TWO sauces!!


Chicken on a stick. Glorified. Two sauces to dip them in. Nom nom nommmmmm.....

This weekend we had our very good friends over for dinner, Big (sorority sister....yeah, her real name is Amanda....) her hubby Forrest. They have a precious little family. Clyde and I were very excited to have adults over and cook them dinner and show them our cute cottage and crank up the grill and take them to a local brewery and have yummy beer. I think they were just excited to have adult time away from their beautiful daughter - so we decided the double date needed to be EPIC.

 We made a rigorous house cleaning schedule, one room clean a night! Tidy up! Be adult like and hospitable and gracious hosts! Clyde is definitely the better cleaner of the two of us, and I'm secretly very thankful for that. As usual, however, my job was to come up with the meal. I thought and brainstormed all week - I knew we wanted to grill, and then I remembered...

Chicken satay. One of my favorite things ever.

Clyde was terrified. I think he was tramatized by labor intensive memories of skewering hundreds of chicken tenders in a cold marinade for various large social events throughout his childhood. My father-in-law, Harky, has made it at a few parties and it's always been one of my favorites, and something I thought was a super special treat.

I was confident. This wasn't a party, it was 4 people! I was ready to tackle it.

And it was AWESOME.

I sort of made up my own version of the marinade and the two dips my father-in-law usually serves with this. I see version of this peanut sauce a lot online, but I haven't come across the second, the fire and ice sauce. Both are wonderful with the chicken. Forrest isn't even a fan of yogurt, but commented that he would "take this sauce on a date and ask it to come up for a cup of coffee."**

**He actually said this in a more vulgar fashion.

Here is how I made the chicken satay --- definitely requires some prep work in the morning, but then when you're ready to grill its all ready to go! Especially if you assign the hubbies the very important duty of skewering the chicken. We also grilled up some peppers and zucchini in a simpler marinade... also for dipping in the sauces :) Surprisingly, I had LOTS of these ingredients on hand already! So it's relatively cheap. And I'll go out on a limb and claim it's sort of healthy.


Chicken Satay Marinade   (for about 25 chicken tenders)
1/3 cup vegetable oil
2 tbsp fish sauce
2 tbsp soy sauce
2 tbsp white wine vinegar (or whatever you have, like citrus juice,, something acidic) 
1/3 cup of coconut milk, unsweetened
2 tbsp brown sugar
2 tsp cumin
2 tsp tumeric (new ingredient i bought, yummy!)
2 tsp ground ginger
2 cloves minced garlic
Salt and pepper to taste 
25 bamboo skewers, soaked about 30 mins before you skewer the chicken


All you have to do is whisk these ingredients together. Take a little taste and add more of what you like. The sauces have lots of flavor so make sure it isn't very spicy or anything. I put all of the chicken tenders in a big gallon ziplock bag and dump the marinade in, close the bag, shake it up, stick in the fridge. Ours marinated for a few hours, but you could get away with letting it sit for an hour or two.

You can also go ahead and put your veggies in a second bag and marinade these too.... we did peppers and zucchini. I marinade these with vegetable oil, salt, pepper, crushed red pepper flakes, dried herb of choice, and minced garlic.

You an ALSO make the two sauces ahead of time!  Here is how I made them.


Thai Peanut Sauce  (in the orange bowl)
3 tbsp creamy peanut butter
1/2 cup unsweetened coconut milk (more to be creamier)
2 tbsp fish sauce
2 tbsp soy sauce
2 tsp cumin
2 tsp ginger
2 cloves garlic, minced 
Juice of a fresh lime
Bunch of cilantro, chopped
Dash of sriracha, to taste **
Salt and pepper to taste

Whisk it all together, taste, adjust, done! **I made this sauce milder because the next one packs a LOT of heat!!

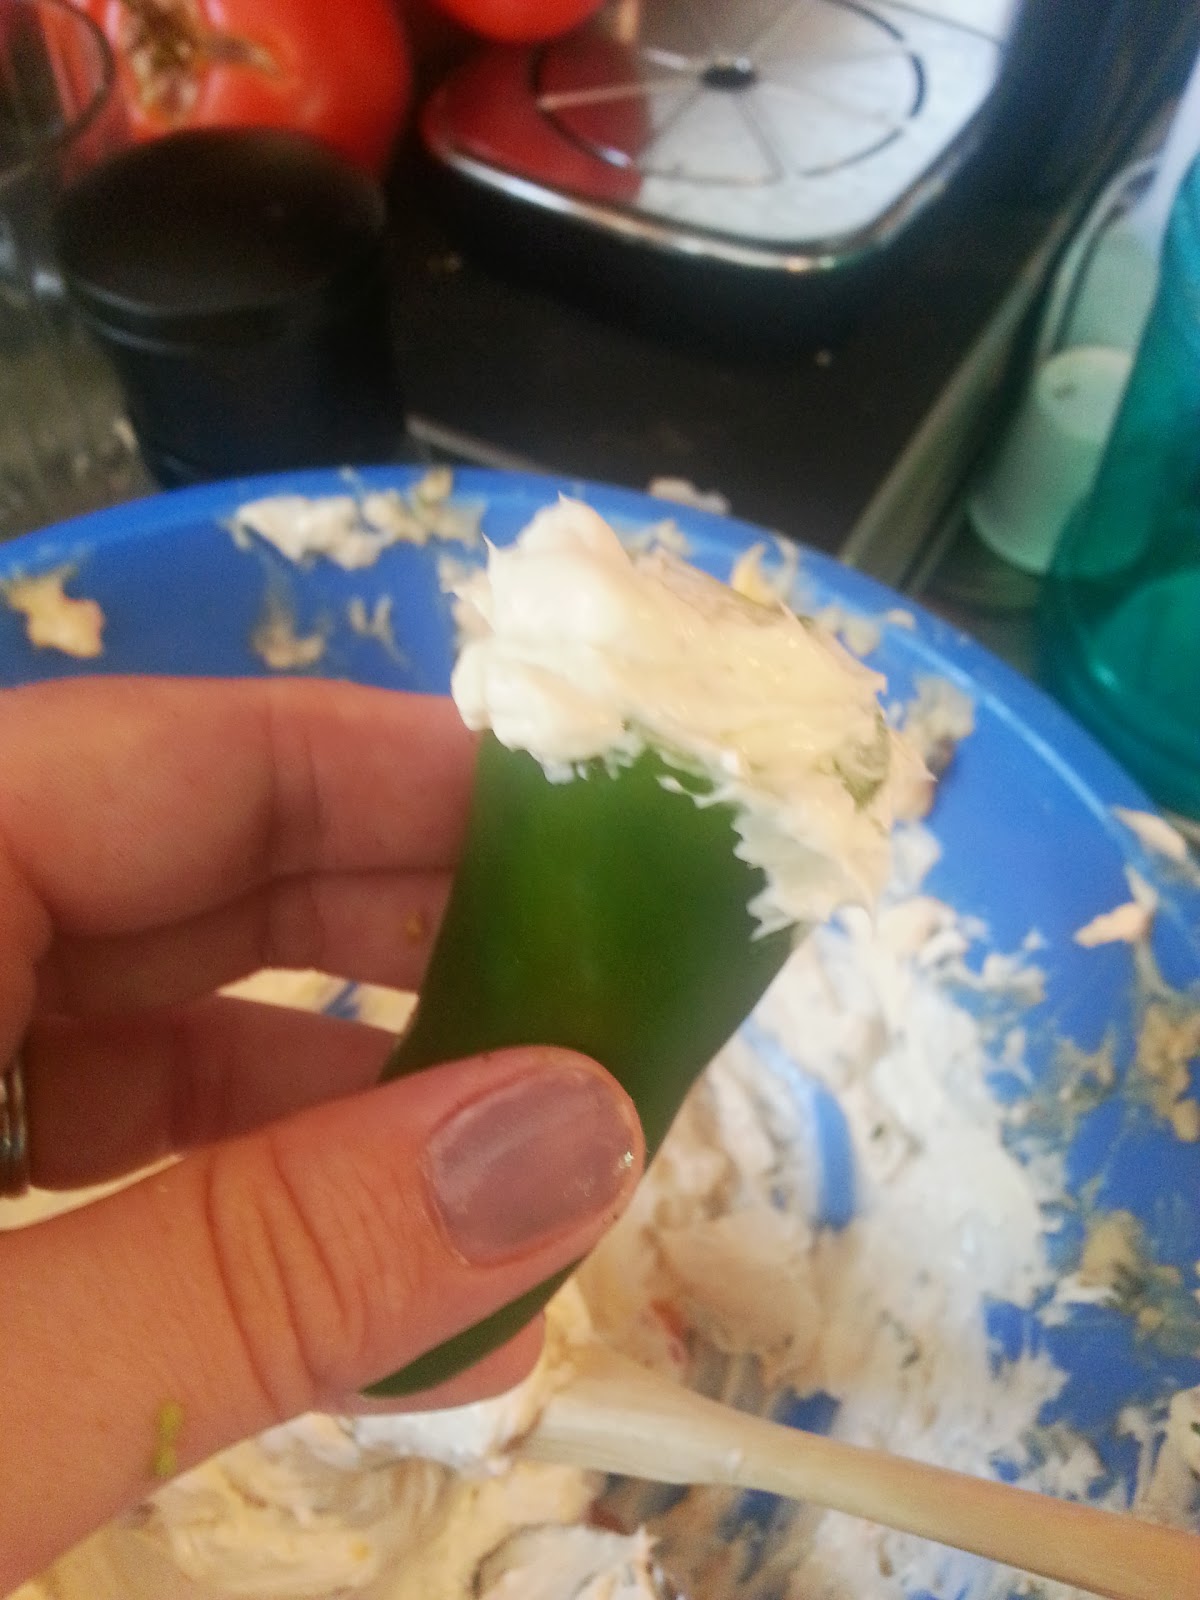
Fire and Ice Sauce (in the blue bowl)
1 cup plain yogurt
1 cup greek yogurt
1 jalapeno pepper, minced **
Bunch of cilantro, chopped
Bunch of fresh mint, chopped
2 cloves of garlic, minced
Juice of a fresh lime
Salt and pepper to taste

Again, just whisk them together, taste, and adjust. **Seriously, taste. My beef with jalapenos is that they are all different spice levels. When I made this batch the jalapeno was SUPER spicy, so I added even more yogurt to tone it down.

Now you did all the work before your friends come over! Have your grill master (if that you, you are awesome) fire up the grill and cook the chicken satay about five minutes on each side.... medium high heat. Grill your veggies, serve with the sauces, DONE.


The chicken on the skewers! We made Forrest and Clyde do that part.

The veggies post grilling. Yuuummmm.


The chicken on our charcoal grill! Darcy is investigating....


We had so much fun and it was so delicious. Big had hers with a nice glass of reisling, and the boys and I drank a hoppy IPA. Clyde served up homemade strawberry buttermilk ice cream for dessert....maybe he'll do a cameo blog post about that, so delicious.

Happy Memorial Day everyone! Hope you all enjoy grilling and thanking our troops! I'll leave you with my favorite picture of the weekend.... baby Reagan meeting Mr. Darcy yesterday morning :) So sweet!!

Monday, May 13, 2013

Sausage Skillet Dinner


I love one pot dinners.

One dish. One pot to clean. Simmers together, put a lid on it, stick the leftovers in the fridge. SO MUCH WIN. And so much delish.

This recipe is my sister-in-law's, with a few minor tweaks of my own. She put it in a recipe box set for my husband when he got his own place after he graduated college (eons ago, hardy har). I think I use that box set more than him now, and this is a favorite we always go back to, especially on cold and rainy days when you want something comforting.


Isn't her recipe book neat? She did a photo book and decorated index cards with cute little decorations.

Anyway, the recipe ---

The Ingredients
1 green pepper, chopped
1 onion, chopped
1 lb your favorite ground sausage
1 large can (28oz) crushed tomatoes
1 can (14 oz or so) WHOLE tomatoes
1 tblsp sugar
1 tblsp chili powder
Dash of crushed red pepper for a kick
Salt and pepper to taste
About half a box of macaroni noodles
Dollops of Greek yogurt for garnish
Shredded cheddar cheese for garnish

How to Make It
Brown the first three ingredients in a large pot over medium heat. Make sure you break apart the sausage as you go.


Next, the rest of the ingredients except the Greek yogurt and cheese. Use your spatula to break up the whole tomatoes -- watch out, they may splatter a bit.  Mix everything together evenly and reduce the heat to a lower setting, and cover the pot. Stir occasionally. It it all finished when the macaroni noodles have cooked through, about 20 minutes or so later. Top each serving with greek yogurt and cheddar cheese. Yummy!!!!


Hope you all enjoy this one - veggies, sausage, cheese, noodles, and tasty. Ta da!

Anyone else has a favorite one pot meal?? :)

Saturday, April 20, 2013

Cheesy Pulled Pork WonTons with Gingery Dipping Sauce

Last weekend I was quite proud of myself --- I spied an amazing sale in Food Lion a nice cut of pork, a Boston Butt (which I always tend to slip and call bottom butt, much to my husband's amusement.) It was originally 30 bucks, but it was marked down on manager special to about 9 bucks.

Bingo. Bought it.

I cooked it low and slow all day and it made for a delicious dinner. Needless to say, I had tons of pulled pork leftovers, and it was the star of my dishes for the week. This was one of our favorites.

Cheesy, salty, and crispy wontons with a fresh Asian inspired dipping sauce. It made for a great light lunch snack before hubby's soccer game. And I got to incorporate one of my new ingredient obsessions.... fish sauce.

 I tease my father-in-law relentlessly for using this in many of his dishes. He swears by it, and often substitutes it for salt in his recipes. It is also a great base for any dipping sauce.

Cheesy Pulled Pork Wonton Filling
Package of wonton wrappers (I get mine from Food Lion) 
 1/2 pound (about) of leftover pulled pork
1/2 package of cream cheese, softened
1/4 cup freshly grated parm cheese 
3 tblspoons greek yogurt
3 cloves of garlic, through garlic press
1 tsp grated fresh ginger
Pinch of salt and pepper
Pinch of crushed red pepper flakes

Gingery Dipping Sauce
1/2 cup of fish sauce
Splash of soy sauce
1/4 cup white wine vinegar (or whatever you have)
Freshly grated ginger, to taste
1 clove of garlic

How to make them:

Preheat the oven to 350.

Put all of your filling ingredients together in a big bowl and mix together. Prepare a large cookies sheet with non stick spray. Then, put a dollop of the filling in your wonton mixture.
Close the flap to make a triangle and kind of mush it so it sort of seals together. Twist the two corners up to make it look wonton-y... I'm not a perfectionist so mine weren't exactly pretty. Place them on the cookie sheet and bake them for about 15-20 minutes or until they look crispy.

In the meantime, make your dipping sauce. I am usually a guess and adjust kind of person with sauces, so start with the basics and add whatever you like, depending on what kind of flavors you want. 

Then, you're finished! They make for a wonderful snack or very light lunch :)

Tip about the ginger: I  put my ginger in the freezer and just grate it with a cheese grater... very easy to handle that way! 

Thursday, April 4, 2013

Frittata

I am extremely lucky and blessed to have a husband that loves to cook too. When we were dating he probably enjoyed it more than me, even! Whenever I went to visit him I would beg and pout and stomp my feet to get him to take me out to dinner. (Okay, maybe not that dramatically, although I'm sure he would beg to differ.) For the sake of his pocket book and sanity, he would tempt me with a really yummy meal that he would cook instead. One of his specialties was frittata, which is where I learned to make it.

Frittata is a funny dish. It is so easy, so elegant, and so delicious. It pretty much works with whatever your favorite ingredients are, or better yet, what you have in the fridge. It also looks super impressive, bonus!

Below is what I like to typically include in my frittatas, but you can swtich it up with what YOU like! Yay!


What you need: 
6 eggs
1 cup milk
1 lb sausage, browned
1 medium onion, chopped
1 roma tomato, chopped
1 handful fresh herb (parsley or cilantro)
2 cloves of garlic, minced 
Dash of red pepper flakes
Dry herbs of your choice (hubby and I like dried mint) 
1/2 cup diced fresh mozzarella cheese
Handful fresh parm cheese to grate on top
Salt and pepper to taste

How to make it:

Preheat the oven to 350. 

First, you need a large deep skillet pan that can go into the oven. Pretty heavy duty one, yup. Brown the sausage over medium heat and break it apart. Once it is browned, remove it from the skillet and put into a large bowl. Next, sautee the onion, garlic, and tomato in the same skillet in the juices from the sausage. Add them to the same bowl with the sausage so they can cool a little bit.

Meanwhile, beat the six eggs and milk in another larger bowl. Add your spices and any dry herbs you would like. Add the chopped up mozzarella. Add the sausage onion tomato garlic mixture once it has cooled a bit and blend with the egg mixture. Add you fresh herbs now too!  I like to use a whisk.


Now you can return the egg mixture to the skillet, which is still over the medium heat. Let it cook for a few minutes and scrape down egg as it cooks, almost like a really big omelette thing. Make sure the sausage and stuff doesn't settle down on the bottom and is spread pretty evenly.

After the frittata has cooked a little bit on the stovetop, put it in the oven and bake it for about 20 minutes. If you check it and its still really jiggly, it isn't ready yet. You will know its ready if it is set and form and you can put a fork in it and it comes out clean. Then, its ready! yay!

Sprinkle fresh grated parm on top.... mmm.


Way easier than quiche.... you don't need a crust and it is just as good if not better.

I hope you enjoy, I'd love to hear your unique frittata ideas! 

Monday, April 1, 2013

Chicken "Parmesan" with Goat Cheese

It's April!!! Also known as the month of my birth. :) I can't wait for some warmer spring weather! 

Confession: I love cheese. I LOVE cheese. It is the best. Goat cheese, if you haven't tried it, is one of the best ones - tart, creamy, delicious.

I came up with this idea in college with my friend Ashley. We used to make a dip for bread with marinara and goat cheese as a yummy snack when we were hanging out. One of my favorite meals in Chicken Parmesan, so I decided to try and combine the ideas. I've been making it ever since ! :)

Spicy marinara, breaded chicken, and goat cheese with pasta.


What you need:
3 Chicken Breasts, cut in half
1 egg + splash of water
Flour, seasoned with salt and pepper
Seasoned Panko bread crumbs
1 turn of olive oil
1 package of goat cheese
Large jar of marinara sauce (or make your own)
1 lb of spaghetti (or your favorite pasta)
Crushed red pepper flakes or cayenne pepper to taste 

How you make it: 

(Preheat your oven to 450).

First, clean up the chicken. Cut the chicken breasts in half. Meanwhile, heat up the olive oil over medium heat in a large sautee pan.

Next, pick out three larger bowls for an assembly line. The first bowl should the seasoned flour, next is the egg wash (mix the egg and water together), and last is the panko bread crumbs. Get ready to make your chicken! I like to use tongs so I don't keep touching the chicken, and it is easier to coat with each layer. (My chicken is tiny, so my assembly line is a little cramped). Prepare a large rectangle backing dish with some of the marinara sauce on the bottom, you are going to place the chicken on top.

**Note: If you make your own marinara sauce or buy your favorite from the store, I like to add some cayenne pepper or crushed red chili flakes to taste because I prefer a spicy marinara with this dish. It's up to you! Try heating it up in a sauce pan and adding more of what you like, make it your own!


Once you coat the chicken in each layer (flour, egg, bread crumbs), sear the chicken for four minutes on each side. Place into the large rectangle baking dish when done. Work in batches until all of the chicken is done and in the baking dish. Top the chicken with more of the marinara, and then place dollops of goat cheese on top. Bake in the preheated oven for 15-20 minutes until the chicken is done. While it is cooking, you can go ahead and get your pasta ready.


Serve it up with your pasta! This would be yummy with some bread and a fresh salad too if you like.

Anyone else have a twist on a classic recipe? :)